


- M. Höhne
- Key Master
 Offline
 - From: Maine
- Registered: 14-3-2013
- Posts: 640
Re: My new Royal Royalite
Spazmelda wrote:
At any rate, it seems that something about the way I had the case put on was causing the carriage mechanism to not catch. I think the base may be missing something or ?? There are 6 screw holes that seem to screw up into the body, then there are 4 more that go through the rubber feet and into the body. I took the first 6 off (the ones that don't go through the feet) and when I did that the ones that go through the feet just pulled right through the rubber grommet things. So, it seems that they weren't actually holding anything in place. That might be the/an issue. It almost seems like they might need a washer or something to keep them from pulling through the rubber grommets. I had noticed when typing on it, that the body did not seem to be quite firmly attached to the case, as the keyboard would kind of float around a bit. Maybe that was causing something to interfere with the carriage mechanisms? Now I just have to figure out how to get the bottom back on, securely, and not interfering with anything, if that is the problem. Oh, and I guess figure out where the nut goes (it was actually a nut, not a bolt- brain fart on my part).
OK. The Royalite mechanism does not need the case to hold anything in place in order to work; it works fine outside of the body, although you may have to raise the frame off the table so nothing rubs on the table.
But if you have it in the body, then the body must be fastened correctly and securely so there is proper clearance for things to move. The upper body is not fastened at all to the frame; it is only fastened to the lower body, the bottom plate, and it relies for positioning on the bottom plate being well fastened to the frame. The upper body is fastened only to the lower body, not to the frame, with those six screws. The lower body is fastened to the frame with the four longer screws that pass through the rubber pieces. The rubber pieces have three functions: vibration dampers, spacers (to keep proper distance between frame and bottom plate), and as feet to protect your desk and prevent sliding around while typing. If your four screws just pulled right through the bottom, you're right---they weren't holding anything. And they should be.
The rubber pieces on all my Royalites have deteriorated and I am still looking for replacements so I cannot tell you what works. I am expecting to have to use multiple pieces for each foot: a rubber washer for the spacer/damper, a rubber foot-shaped piece with a recess for the screw head, and maybe an inner sleeve and washer to reduce the hole size so the screw fits snuggly and holds the foot and body-to-the-frame securely.
HTH
We still don't know about that nut. Figure that out before you put the body back on.
Have Fun!
- Spazmelda
- Key Master
Offline

- From: Ohio
- Registered: 25-2-2015
- Posts: 830
Re: My new Royal Royalite
That does help, and I think that you are right, something was not aligning correctly and causing the problem. Maybe pressing the carriage rail to the carriage release position.
What I'm thinking for the feet maybe just put a washer on the outside of the base where the 4 screws go, like on top of the remaing rubber. I would have to find some longer screws to make up for the difference in distance. Then, some sort of rubber feet to go over the screws and washers. Or, I do have a product called instamorph. It's a heat and mold plastic, I might be able to make something out of that, Hmm. Don't know. And yeah, I will try to figure out where the nut goes before I out it back together.
- KatLondon
- Key Master
Offline

- From: London
- Registered: 11-10-2014
- Posts: 995
Re: My new Royal Royalite
Ha! If I had mine still I'd be taking it apart to see if I might see anything that could help you out. Mr Höhne has given excellent advice. Really it is a question of looking at the backspace key and tracing its workings back till you see something that isn't connected (fgor example). It does sound like an escapement issue though (maybe). Hope it's accessible and you can find it easily.
I have an Olympia SG3 that does the same one-0character-out thing on the left margin. And it is a machine that still needs ore cleaning, and has lots of rust inside it, though each time I go over it it does get better. In my experience, such as it is, the two main things that help typewriters work better are cleaning and USE. I've often had things that I thought were really broken just start to work again through being got moving.
Good luck! ![]()
- •
- KatLondon
- Key Master
Offline
- From: London
- Registered: 11-10-2014
- Posts: 995
Re: My new Royal Royalite
Anyway Spazmelda, why not have a picture of your Royalite? It is a Royalite thread, after all ;)
- •
- Spazmelda
- Key Master
Offline
- From: Ohio
- Registered: 25-2-2015
- Posts: 830
Re: My new Royal Royalite
Okay, I will post some pics later. She is naked at the moment, but I will get her dressed and do some pics ![]()
Okay, here we go. The bottom and case aren't attached since I'm still working on the innards.

Last edited by Spazmelda (17-3-2015 09:21:00)
- Spazmelda
- Key Master
Offline
- From: Ohio
- Registered: 25-2-2015
- Posts: 830
Re: My new Royal Royalite
M. Höhne- I may have found a solution to the feet issue, since you said you had some typewriters with the same issue I thought I'd post what I did. On Richard Polt's website there is a section on typewriter repair. In the subsection dealing with rubber issues, I found this:
Ryan Long had luck fitting his own Remington portable #5 with "Replacement Aqua-Seal Washers for 'American Standard,'" size: fits 2k-2h and 2c, made by Danco for faucet repair. They fit into place and lock with an O-Ring.
So, I went to Home Depot and got these parts. I also got some small washers for 3mm screws, and picked up some 3mm pan head screws because those flat head screws are difficult. At home, I had no luck squeezing those rubber parts through the holes in the base of the typewriter, but I had noticed that there was another smaller size of the same part available. Went back to Home Depot and got those guys. I was able to fit them through the hole. Maybe the first ones fit too, and I just couldn't figure out how to do it.
Here is a picture of the box for the parts I used, they come 2 to a box, so I got two boxes.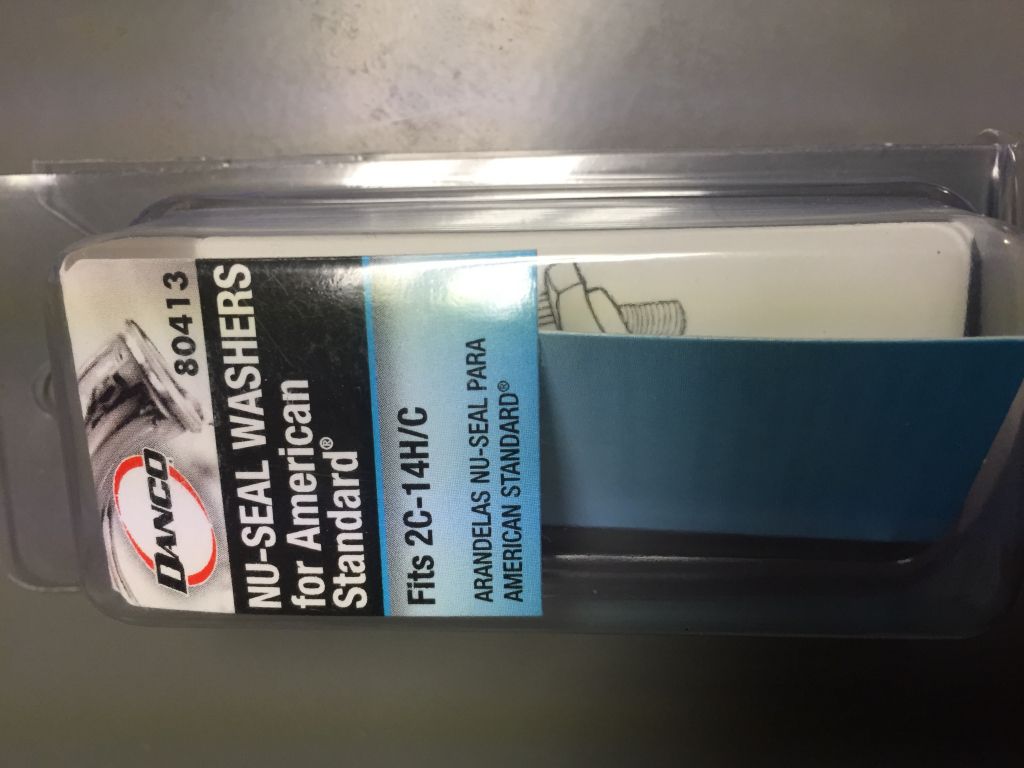 [/url]
I used a belt hole punch on the smallest setting to punch a hole through the rubber for the screw, then assembled the part with the washer in the indentation, and the screw going through that.
The parts were a little floppy in the hole, luckily the box with the larger rubber pieces had an o-ring included (no idea what size o-ring). I slipped that over the outside portion of the feet, and it helps hold it more firmly in the hole.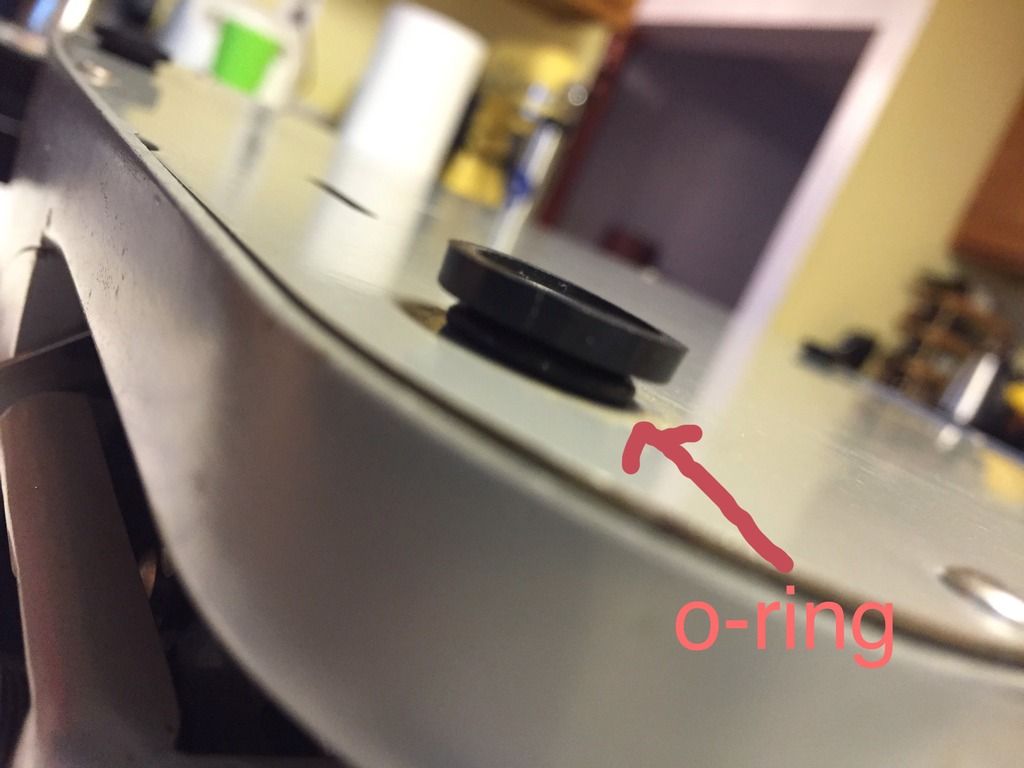 [/url]
I do not have a picture of the inside of the base, and I'm not going to take it back apart to get one, because this typewriter is a PITA to get the base back on. Feels like you need 14 hands to get all the little rubber parts lined up where they are supposed to go. Anyway, on my typewriter, there was thick black rubber ring/spacer that went around the white feet on the inside. I went ahead and put that back in because I wasn't sure if the inside needed that extra area of support. Since they were in good shape, I just stuck them back in.
Got everything put back together and it all seems to line up properly. I think the improvised feet look pretty nice!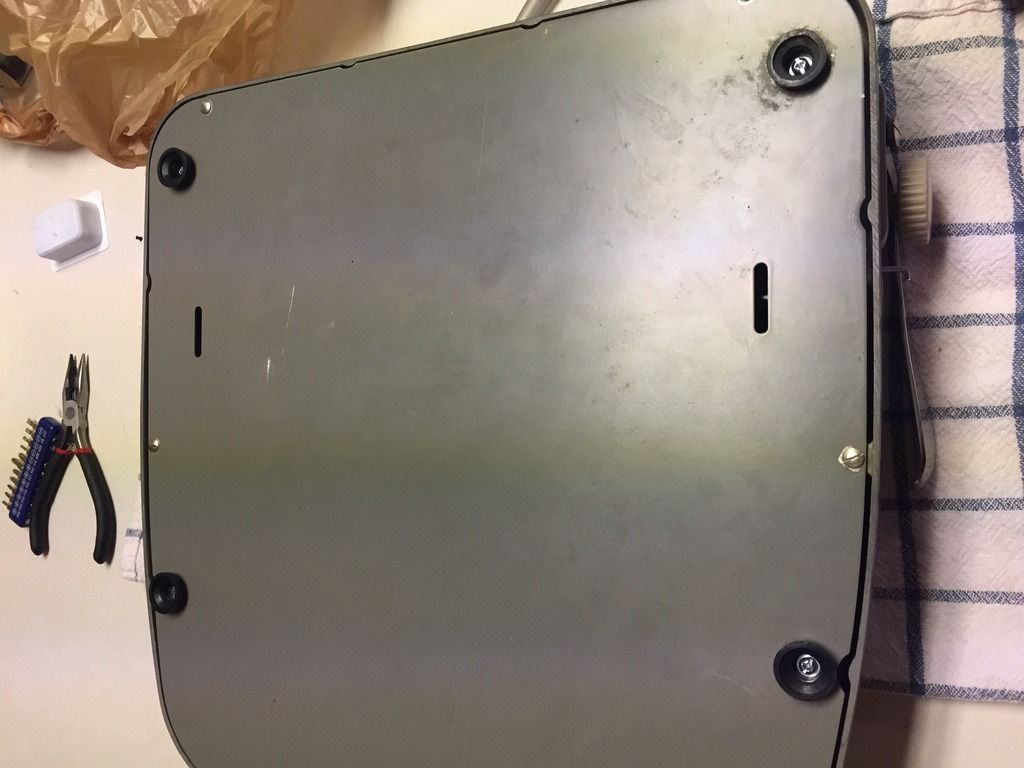 [/url]
- M. Höhne
- Key Master
Offline
- From: Maine
- Registered: 14-3-2013
- Posts: 640
Re: My new Royal Royalite
Looks like you did a good job and Thanks! for the specific part numbers for the parts that worked.
The rubber washers inside where the feet attach are definitely important; they position the mechanism within the body at the proper height so the carriage doesn't drag on the body and the spacebar and other keys are at the right height. The fact that they are rubber instead of metal keeps the noise down and absorbs some shock.
For positioning all those other washers when putting the six bottom screws back in, try a dab of rubber cement to hold them in place while you set up everything else and get the screws through the holes. Do avoid too much rubber cement as it can discolor paint.
Congratulations on a good job of typewriter repair.
- Spazmelda
- Key Master
Offline
- From: Ohio
- Registered: 25-2-2015
- Posts: 830
Re: My new Royal Royalite
Ah, if I'd had rubber cement, I would have tried it. I tried a little dab of hot glue, but it didn't stick. I'll definitely invest in some rubber cement for the next time I have to get into it. Great tip!
Right, so I understand that the height inside the case is important, and the rubber parts that I bought actually go through the holes and the part that goes on the inside is similar in height to the original parts (it's actually a hair taller, like 0.1mm taller maybe), it's smaller in diameter though, and I didn't know if I needed a diameter of spacer that was the same, or if the smaller diameter would work. If I showed you a picture this would probably make more sense, lol.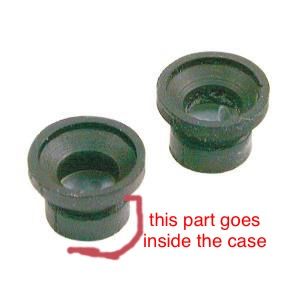
Last edited by Spazmelda (22-3-2015 11:48:38)
- Uwe
- Moderator
Offline

- From: Toronto, Canada
- Registered: 12-3-2013
- Posts: 4,410
Re: My new Royal Royalite
Plumbing washers are one route, but I've always preferred to use rubber bumpers (used on many things like the bottom of a chair leg). And there's no question that you have to sometimes get very creative with cutting and shaping a bumper to fit, but for a non-visible part it's a question of function over form.
Original rotted rubber feet: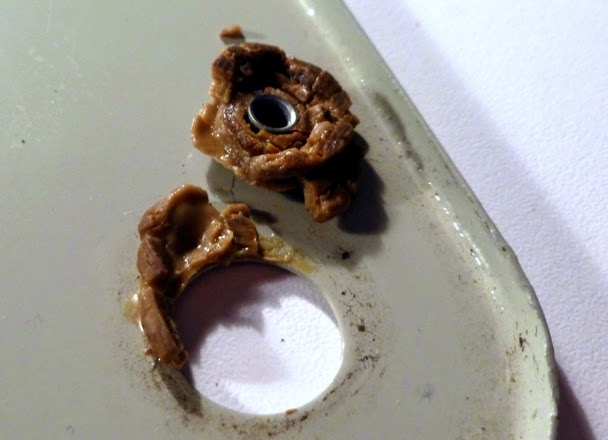
Replacement bumper before modification: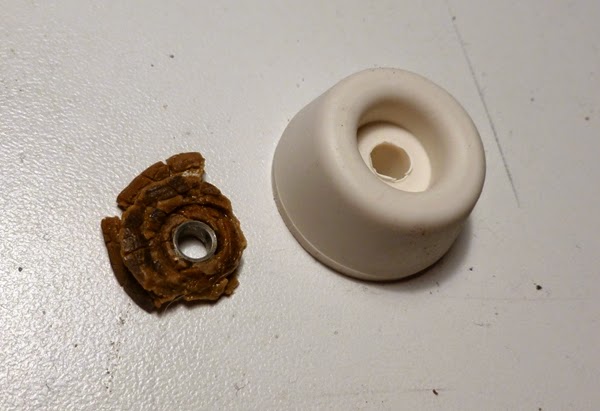
A hacksaw blade and a sharp knife is all that's needed to cut the bumper to size and to put a groove around it to fit the case opening: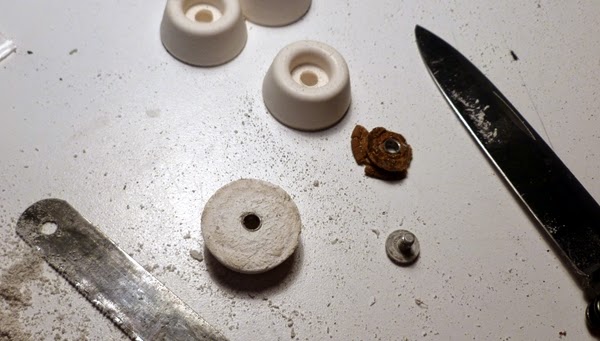
Final result. These photos were from the first time I tried it, so these case feet don't look as good as the more recent ones I've done. A little practice goes a long way and now my bumper feet look as good as stock: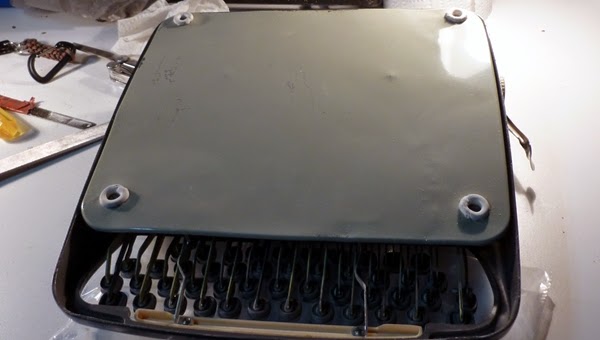
The pronoun I has always been capitalized in the English language for more than 700 years.
- Spazmelda
- Key Master
Offline
- From: Ohio
- Registered: 25-2-2015
- Posts: 830
Re: My new Royal Royalite
Nice! Very similar look to the originals.
