- Laurenz van Gaalen
- Speed Champion
 Offline
- From: The Netherlands
- Registered: 20-7-2019
- Posts: 417
Re: Royal Parade ribbon lift
The on feet and motion adjustments on my Halbergs were the most difficult I have ever done. Because in both case's the carriages were completely out of adjustment, there wasn't a good starting point. It took me hours to get it right. It's been while ago, unfortunately I can't remember what approach I used. I do remember that taking over the positions of the adjustment nuts of a good Halberg didn't help.
Please note that I did the adjustments with trial and error and without proper documentation. Maybe the Royalite Repair Bible offers some insights that are of help.
Fun fact and maybe good to know: on two of my Halbergs I discovered a dedicated ring to cylinder adjustment in the form of one or two thin brass plates that were mounted behind the ring/type guide.
Lau
- robmck
- Speed Champion
 Offline
 - From: Seattle, WA
- Registered: 31-1-2022
- Posts: 390
Re: Royal Parade ribbon lift
Laurenz van Gaalen wrote:
The on feet and motion adjustments on my Halbergs were the most difficult I have ever done.
Thanks, that's validating. I found it very frustrating getting the adjustments made so far, so was not looking forward to doing it again.
Laurenz van Gaalen wrote:
Please note that I did the adjustments with trial and error and without proper documentation. Maybe the Royalite Repair Bible offers some insights that are of help.
Unfortunately, for on-foot & motion, the Repair Bible only really points out where the eccentrics are and to remove the cover before adjusting.
Laurenz van Gaalen wrote:
Fun fact and maybe good to know: on two of my Halbergs I discovered a dedicated ring to cylinder adjustment in the form of one or two thin brass plates that were mounted behind the ring/type guide.
Yes, this is exactly it. The Repair Bible says to adjust shims accordingly, and if the impression is still not correct after removing the last of the shims, there are a couple of eccentric screws on the carriage fulcrum (right next to where the fulcrum contacts the motion stop on the frame). It goes on to note that adjusting those eccentrics affects the escapement trip point, bi-chrome, writing line, motion and margin stop adjustments.
Well, that sounds like an afternoon's worth of tinkering. Hopefully, I don't have to touch those eccentrics.
If nothing else, this typewriter seems to be a good learning opportunity (sort of an apprentice's exam)...
- •
- Laurenz van Gaalen
- Speed Champion
 Offline
- From: The Netherlands
- Registered: 20-7-2019
- Posts: 417
Re: Royal Parade ribbon lift
robmck wrote:
If nothing else, this typewriter seems to be a good learning opportunity (sort of an apprentice's exam)...
Yes, after this one the most machines will be easy.
I still wonder what's the idea behind the design. It is not easy to adjust, nor a cost cutting measure. The only reasons I can think about is that it helped to make the production of the machines easy (with the help of special tools and/or assembly procedures) or that it is the result of an evolutionary design process.
- robmck
- Speed Champion
 Offline
 - From: Seattle, WA
- Registered: 31-1-2022
- Posts: 390
Re: Royal Parade ribbon lift
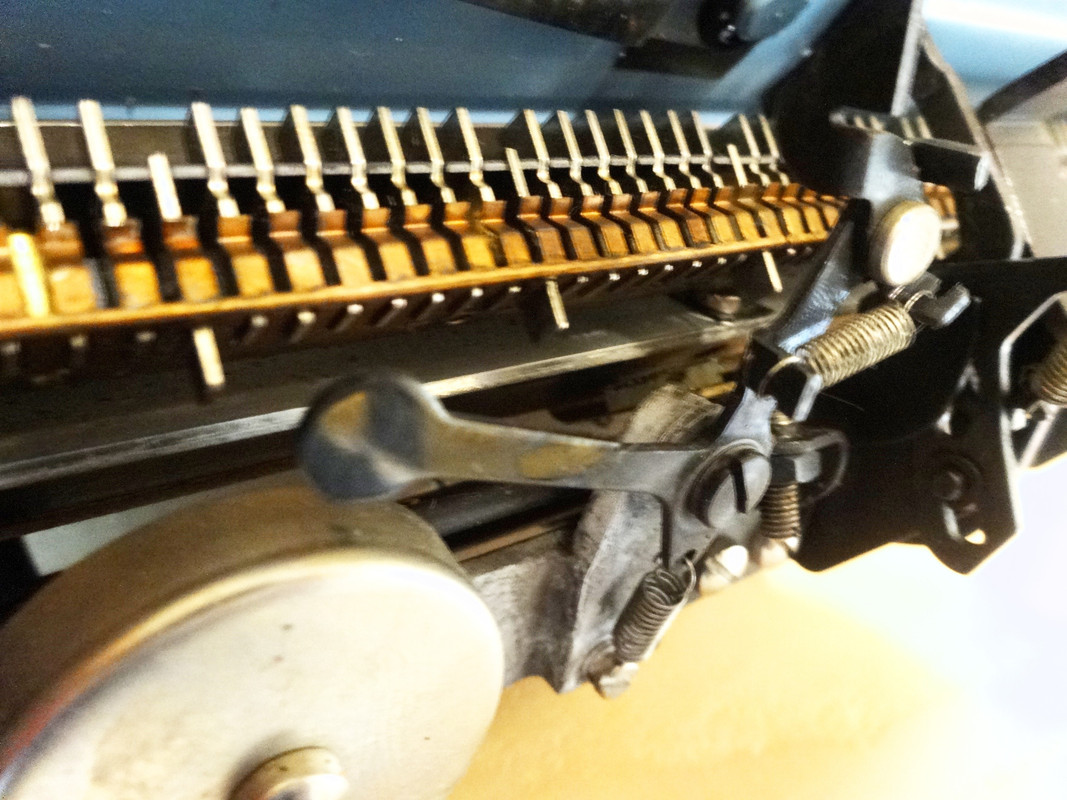
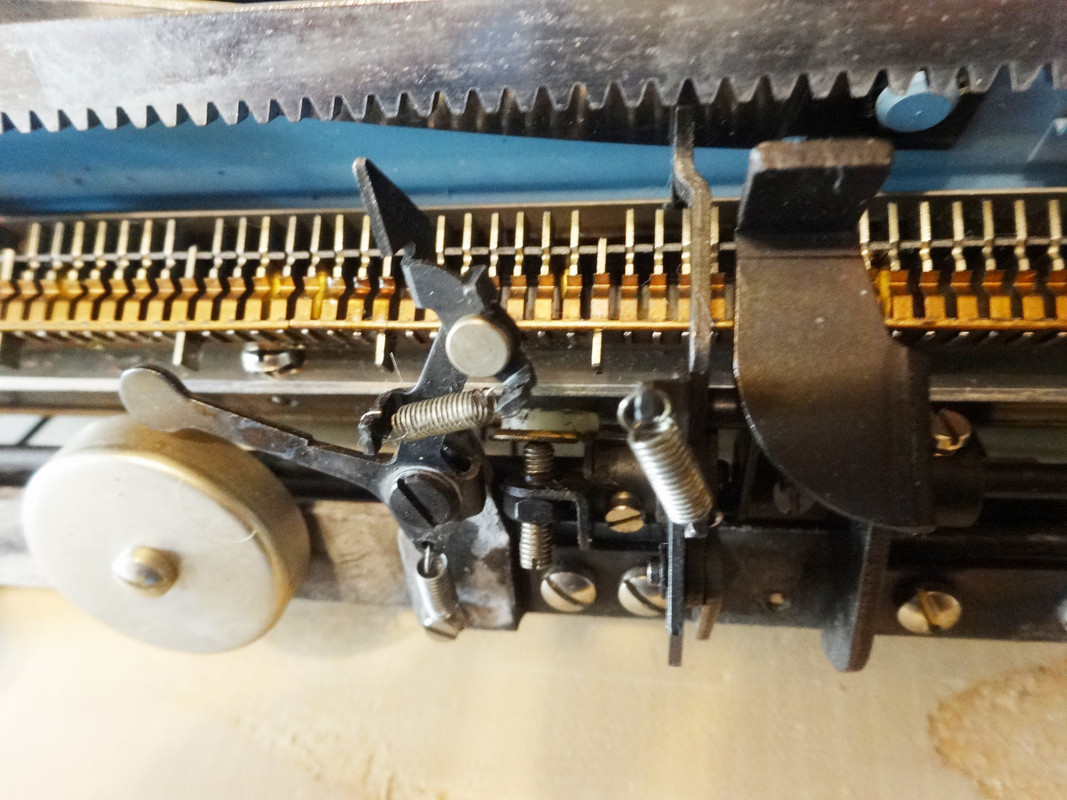
Pete, do you still have your Parade's out of their skins (or remember how the tabulator works)?
My tab set / clear assemblies were all out of whack and the set wasn't even on the axis right. That's cleared up now, but there are still issues:
1) The tabulator arm (the thing the tab stops hit to stop) comes up really far, dragging on the tab stop rack.
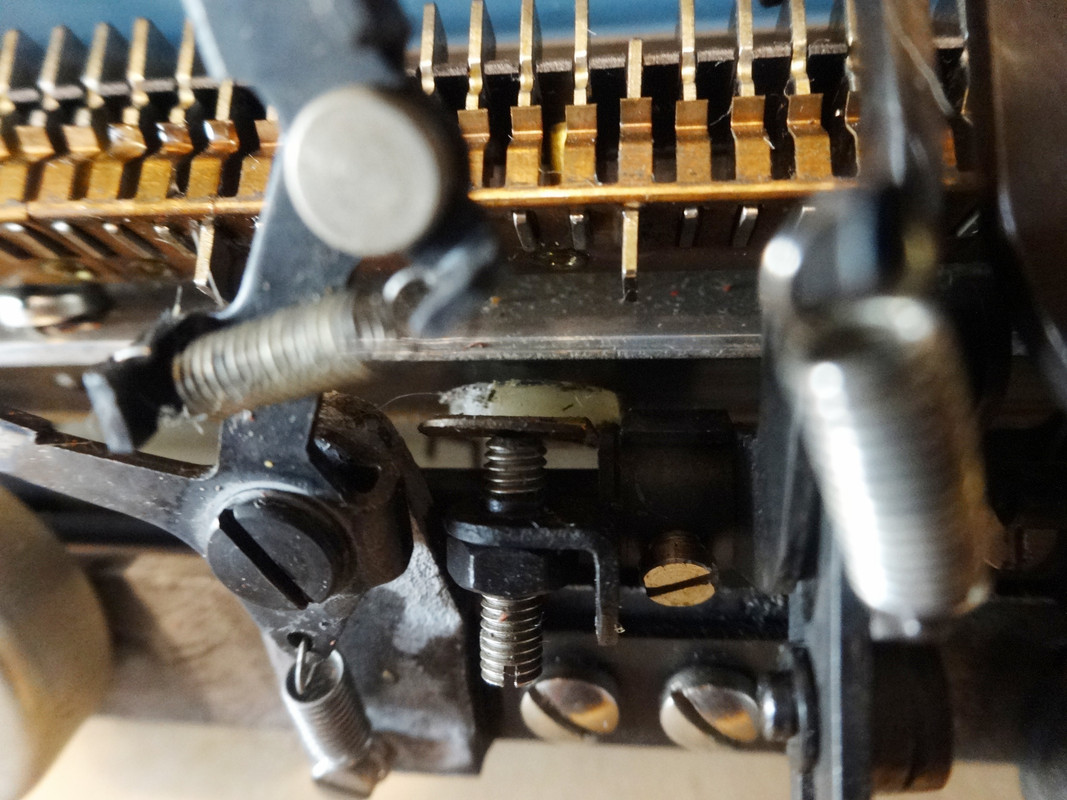
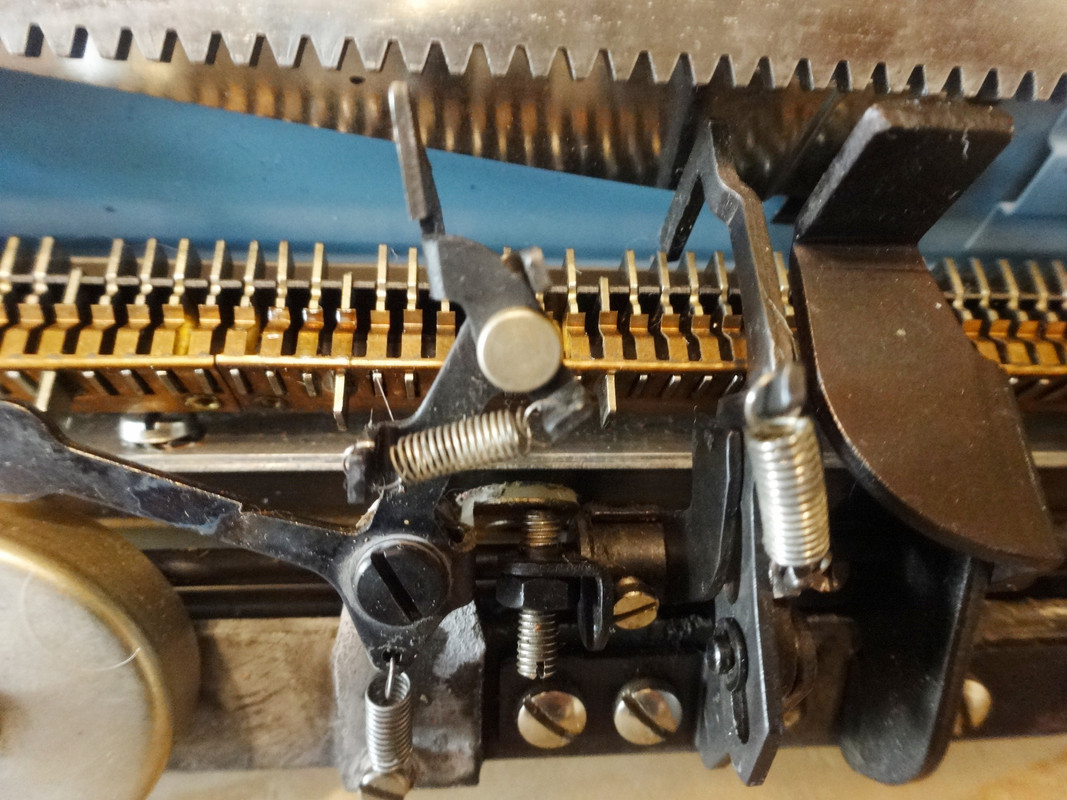
2) The tab brake (little white disk on a copper arm in photos below) seems completely out of position - the set screw on the tab (vertical screw that goes nowhere in the first picture) doesn't make contact with anything in lowercase position and just touches the tab brake arm in caps position, but the tab brake is too low to contact with anything.
The repair bible doesn't have anything on the tabulators, so I only have the parts diagram which, since everything's floating in the diagram, I can't tell what interacts with what.
I *think* the tabulator is supposed to press the tab brake against the carriage rail, and that pressure may also act as a stop to keep the tab arm from colliding with the tab stop rack. (Though, there is also a stop at the front of the machine I could form to tweak it).
(These images should be clickable to see bigger)
Back of carriage with the set screw that I think is supposed to contact the tab brake just left of center, mounted on the same rocker axel as the tab arm (hiding behind the spring just right of center).
Different angle, you can see the top of the copper arm (rounded end) for the tab brake, and where the set screw is in relation to it. (This time, the tab arm is hiding behind the bell hammer arm). 
The tab brake (white plastic disc, from the side). Seems really far and low from the carriage.
From the bottom of the typewriter, you can see the tab brake. Still seems out of position. It's in a tricky spot to try to form the arm, and one of the screws mounting it is also an adjusting screw for the escapement, so taking the tab brake off means re-tuning the escapement. (This machine seems to have a lot of parts that serve multiple purposes - like the way the platen axel holds so much of the carriage together). 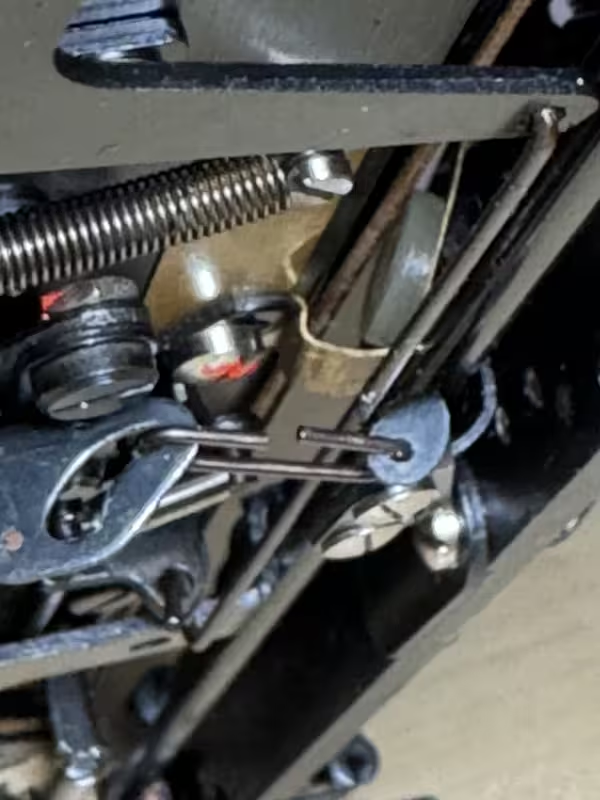
Side note: I think I've got the motion, and ring & cylinder dialed in. I ended up taking out both brass shims and adjusting the ring & cylinder eccentrics. Then, I redid the on-foot (starting with caps) and lowercase. I got everything pretty close, but the lowercase rides a bit low on the right side of the carriage. Unfortunately, lowering the right lowercase eccentric doesn't help because it's hardly touching in the first place. The left lowercase eccentric is holding the carriage up. If I lower that, then the left lowercase will ride high, with he right aligned.
That asymmetry, plus the fact that the carriage feels a bit looser in the rails than I'd expect, leads me to wonder if this machine took a fall at some point.
- •
- robmck
- Speed Champion
 Offline
 - From: Seattle, WA
- Registered: 31-1-2022
- Posts: 390
Re: Royal Parade ribbon lift
[Ha! Looks like this thread has gone way beyond the ribbon vibrator lift...]
- •
- Pete E.
- Typewriter Talk Elite
 Offline
- From: Idaho - USA
- Registered: 23-6-2020
- Posts: 2,537
Re: Royal Parade ribbon lift
Rob,
Your images (with an .avif file extension) do not open up for me and does not seem to be supported by my current Linux Mint applications set-ups.
Your previous photos (with jpeg, jpg fileextensions)...I have no problem seeing or opening.
.
- robmck
- Speed Champion
 Offline
 - From: Seattle, WA
- Registered: 31-1-2022
- Posts: 390
Re: Royal Parade ribbon lift
My apologies. I thought it would convert them on upload. Oh well.
Here they are again, with the descriptions repeated:
(These images should be clickable to see bigger)
Back of carriage with the set screw that I think is supposed to contact the tab brake just left of center, mounted on the same rocker axel as the tab arm (hiding behind the spring just right of center).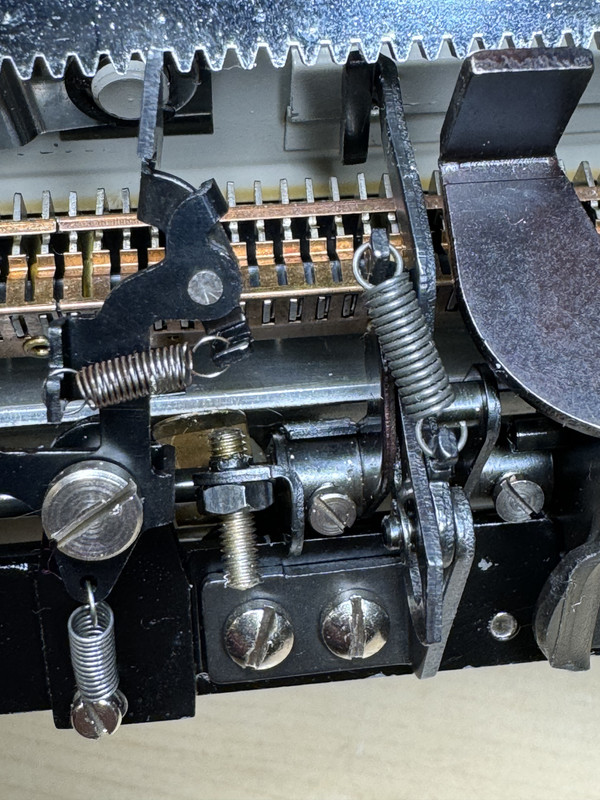
Different angle, you can see the top of the copper arm (rounded end) for the tab brake, and where the set screw is in relation to it. (This time, the tab arm is hiding behind the bell hammer arm).
The tab brake (white plastic disc, from the side). Seems really far and low from the carriage.
From the bottom of the typewriter, you can see the tab brake. Still seems out of position. It's in a tricky spot to try to form the arm, and one of the screws mounting it is also an adjusting screw for the escapement, so taking the tab brake off means re-tuning the escapement. (This machine seems to have a lot of parts that serve multiple purposes - like the way the platen axel holds so much of the carriage together).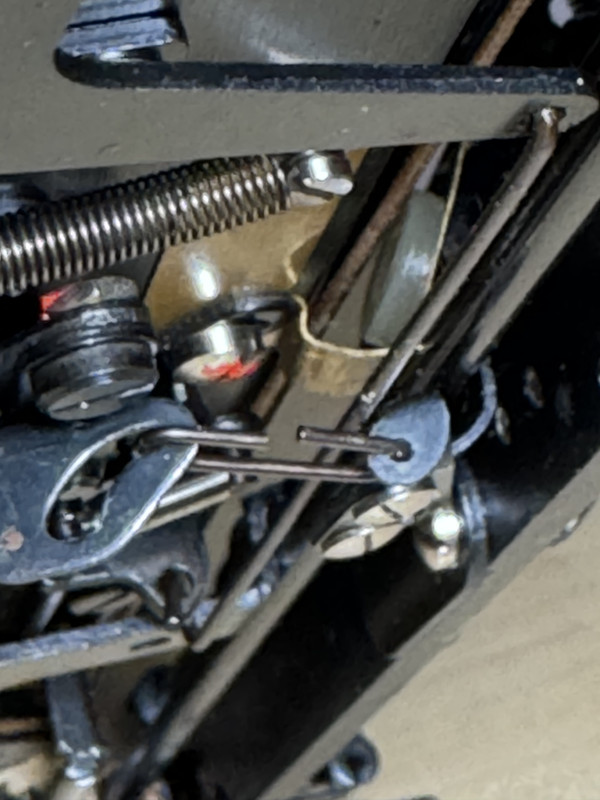
- •
- Pete E.
- Typewriter Talk Elite
 Offline
- From: Idaho - USA
- Registered: 23-6-2020
- Posts: 2,537
Re: Royal Parade ribbon lift
Rob,
I will post my 12 photos in 2 batches.
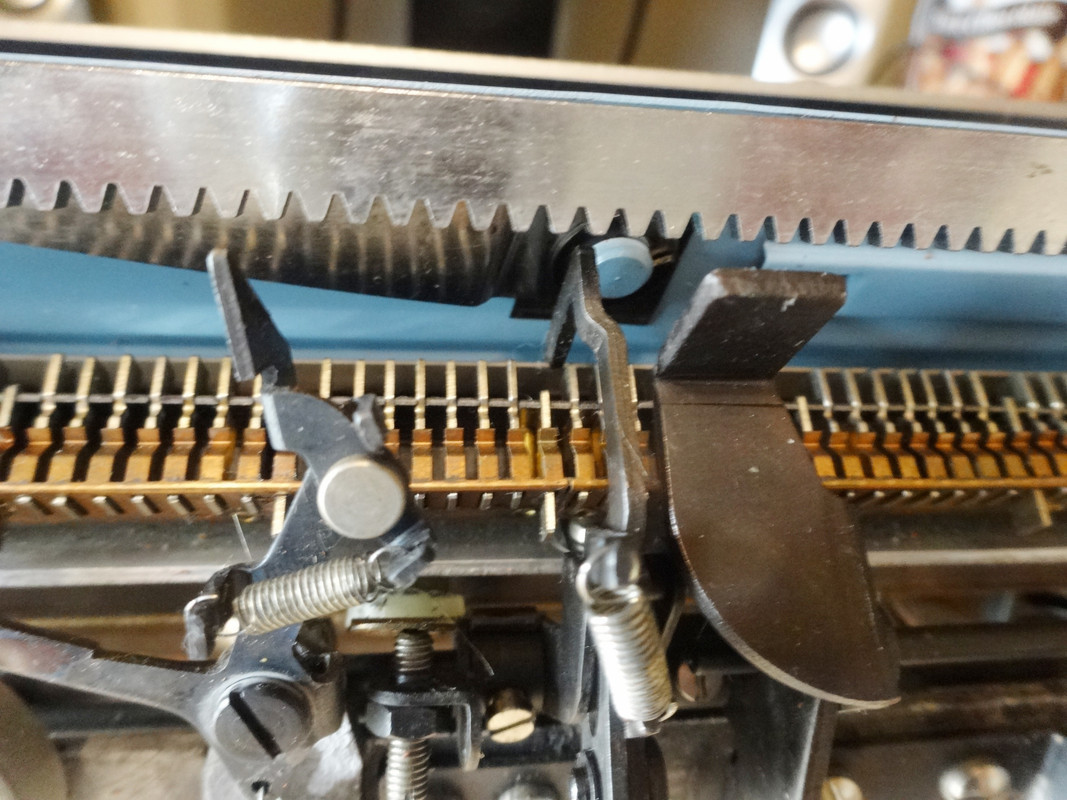
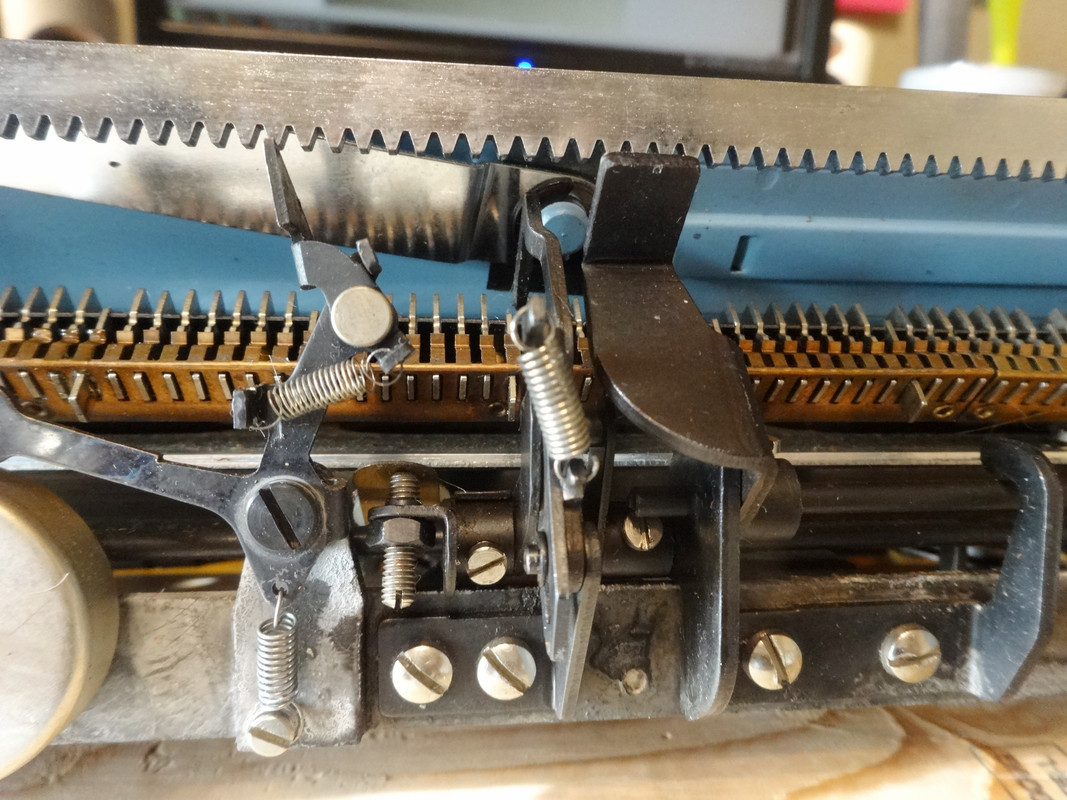
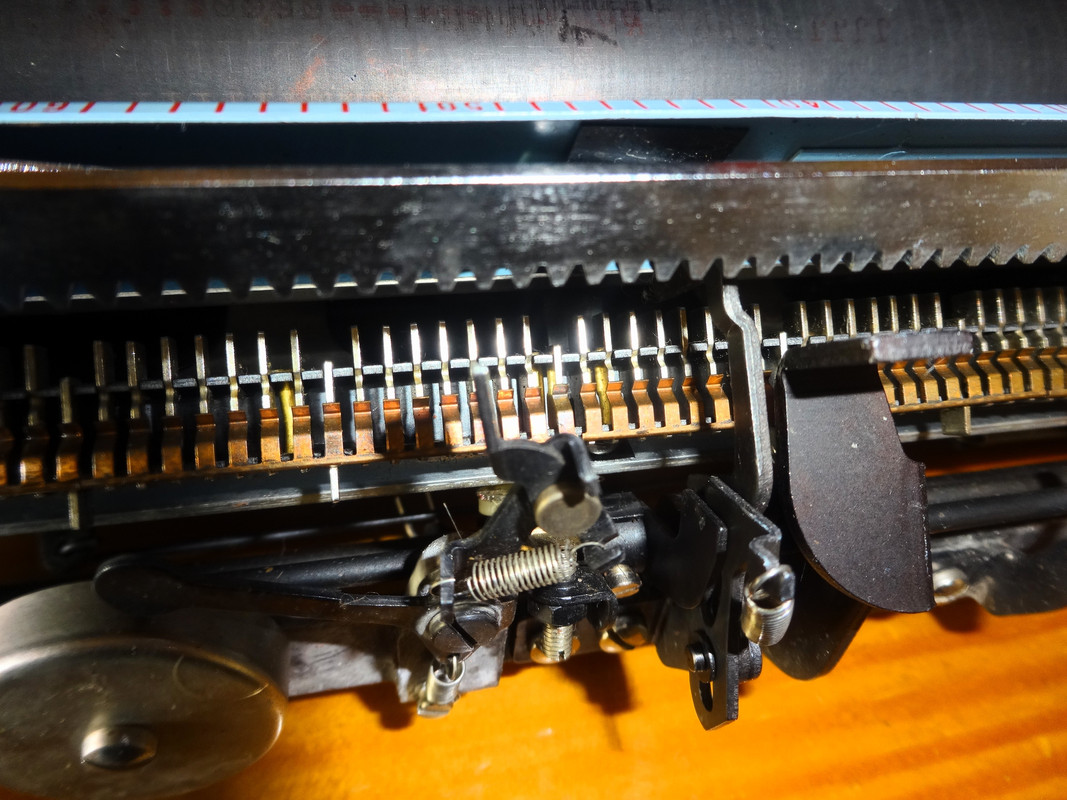
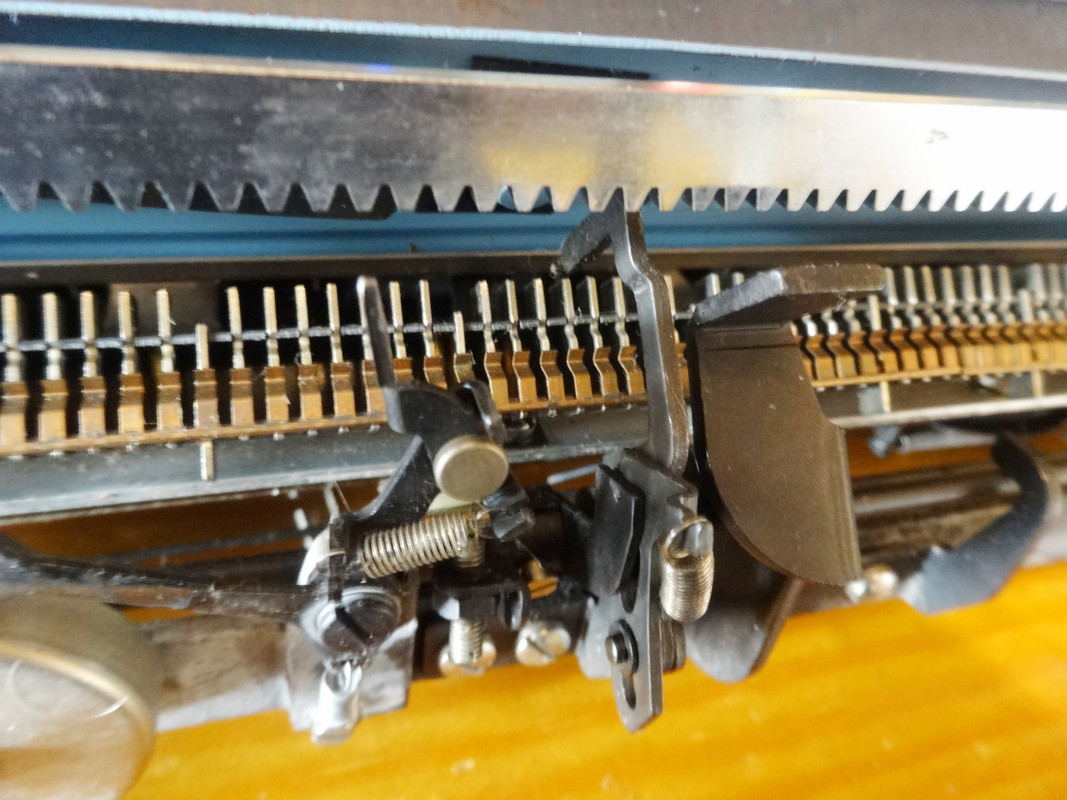
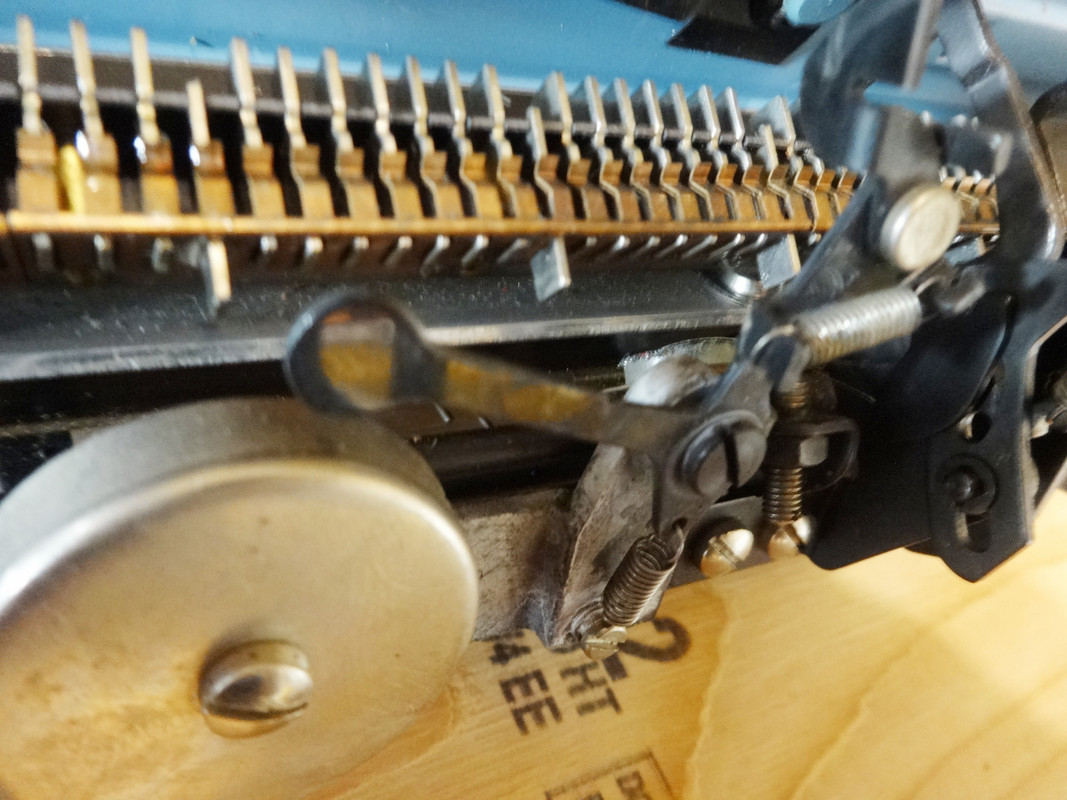
My Tab brake is parallel with all the rails on my machine.
And there are some differences on my (Americana Jr.) machine than on your machine. My other Parade (that I repainted green and tan) was gutted of all its Tab controls before it arrived at my home, so I did not bother to take it apart to take other photos.
I will leave this machine apart until Sunday night and then I will put it back together.
.
- Pete E.
- Typewriter Talk Elite
 Offline
- From: Idaho - USA
- Registered: 23-6-2020
- Posts: 2,537
Re: Royal Parade ribbon lift
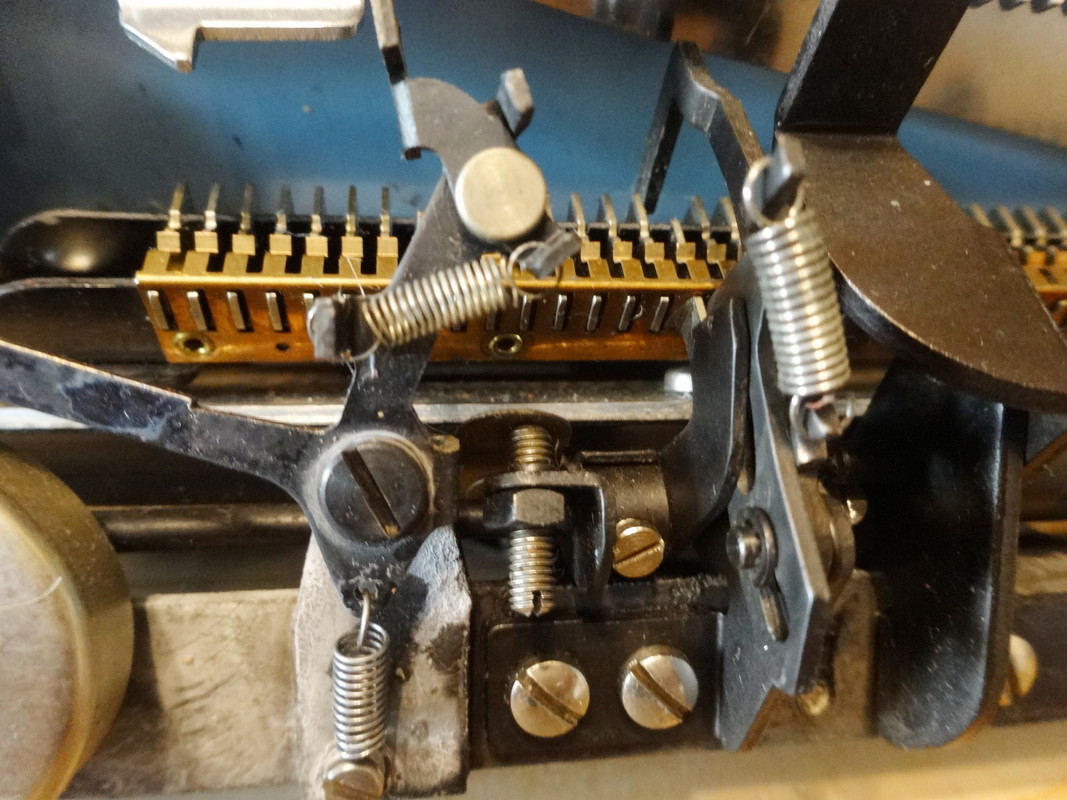
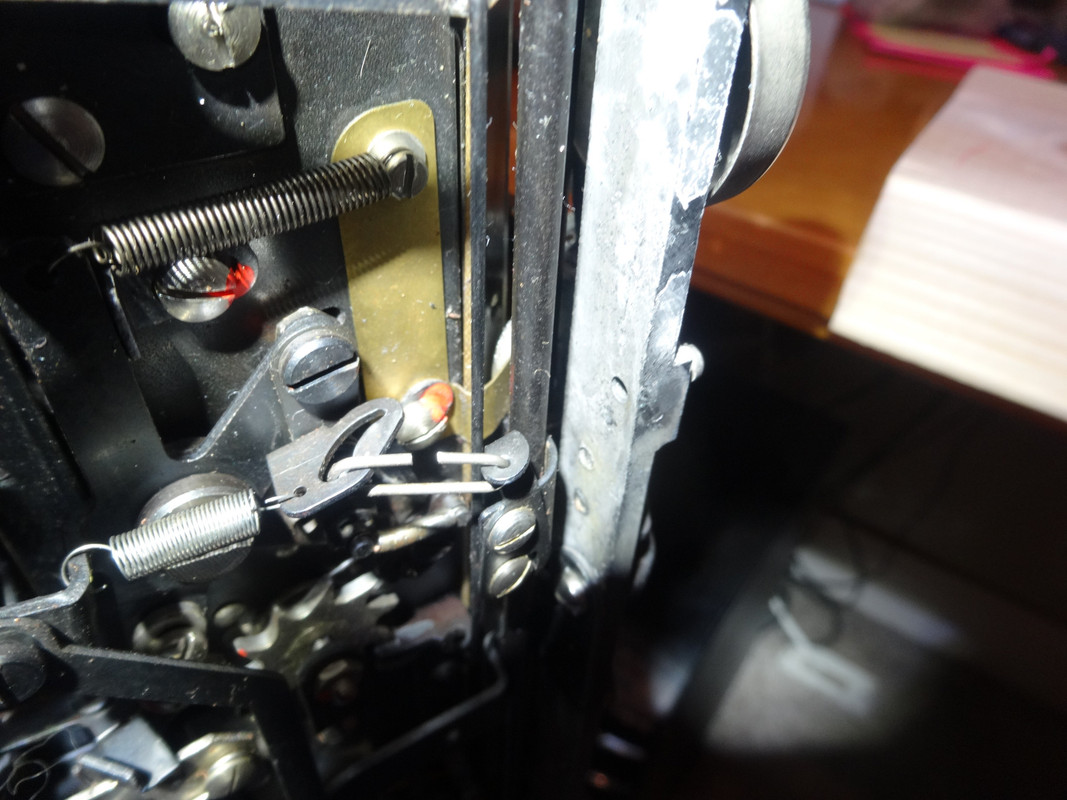
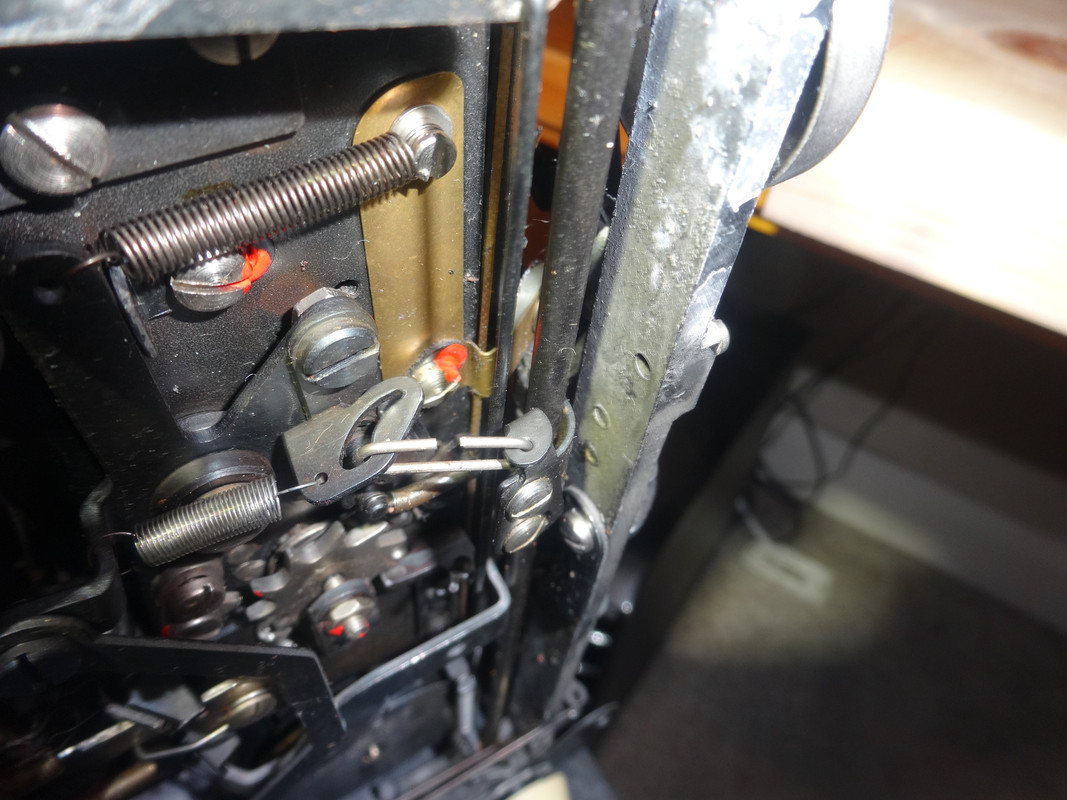
Last batch of 6 more photos...
.
- robmck
- Speed Champion
 Offline
 - From: Seattle, WA
- Registered: 31-1-2022
- Posts: 390
Re: Royal Parade ribbon lift
Thanks Pete for all your effort! This is really helpful. My tab break is all bent out of shape in comparison. Will have to work on that.
When you activate your tab, do you see any stop that prevents the tab arm from smashing into the tab rack (other than the stop at the front of the machine)?
- •


